Once the step is created (as we did in the previous help page), we'll now setup steps in various sections.
Below are the major types of properties in a step that we'll be looking foward too to setup.
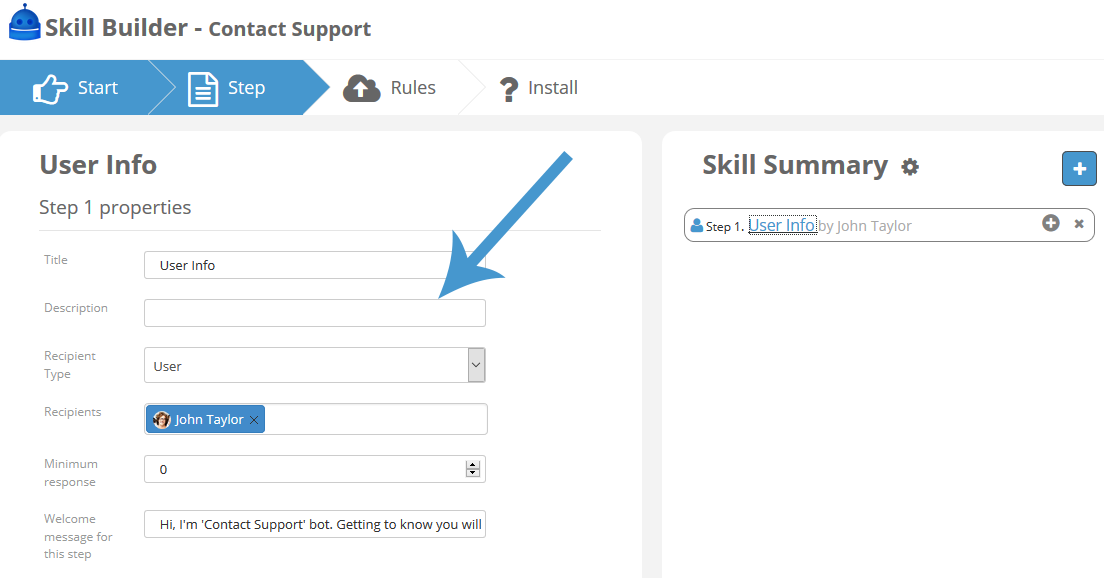
The first section is where you'd input the primary information about the step as below:
- Step's Title (name of step)
- Step's Description (write some detail about the step that what action this step will perform)
- Step's Recipient Type (in this case it will be user)
- It will show name of currently logged-in use in Recipient field.
- In Welcome message field, you can give custom message for the user when user will oField: pen this form.
Notice in the screen shot below that points towards the first primary section.
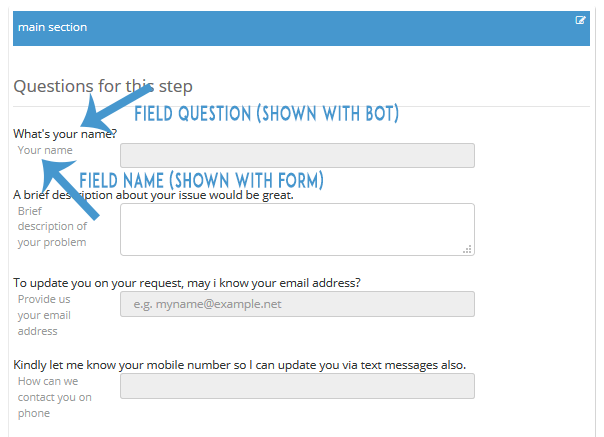
Likewise, the 'Main Section' that is already a part of the step by default. Here we'll be including four questions/fields.
What is a Question & Field?
There are two ways to excute our skill once it gets completed. Either by a chatbot or by directly executing the form using the 'Skill URL' which we get access to once the Skill is ready.
In the case of our Skill, a field's name represent a particular form field that the user gets to see while executing the 'Form version' of the skill.
Where as, the field's question' represent the fields when the Skill is executed via the chatbot in the form of questions being served.
Taking the following screenshot under consideration, we'll be adding four fields/questions as below:
Field Title: Your Name
Field Question: What's your name?
Field Title: Brief description about your problem
Field Question: Brief description about your issue would be great
Field Title : Provide us your email address?
Field Question: To update you on your request, may I know your email address?
Field Title: How can we contact you on phone
Field Question: Kindly let me know your mobile number so that I can update you via text messages also
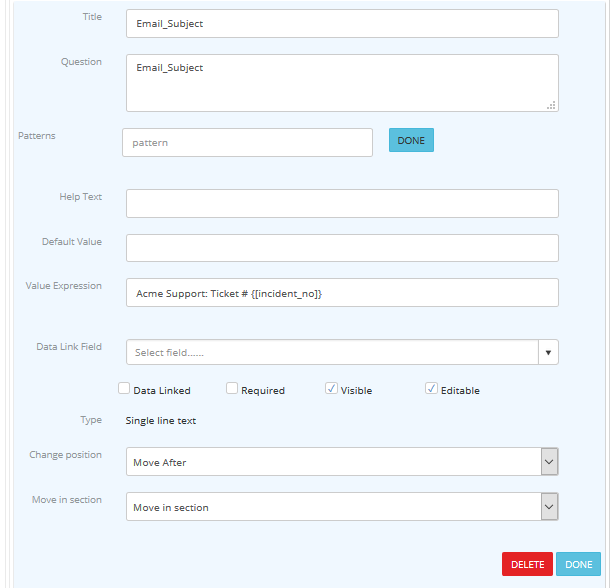
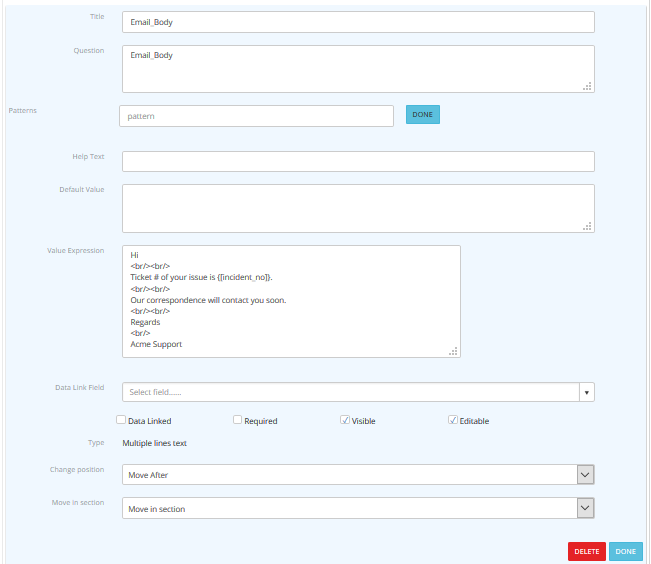
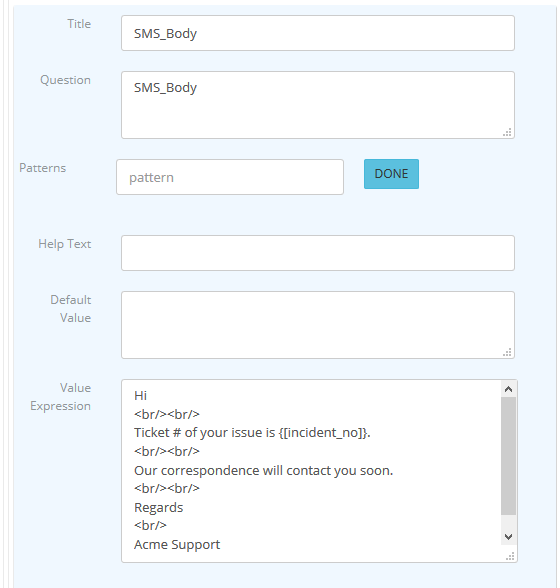
Next up, we'll be creating a new section that would hold four fields for us which won't be sho Title : Pwn to the user and would be hidden. They'll be used to map them against the Step 2 and 3 in the upcoming parts of the help.
Notice the screenshot below for all of these four fields that you can create as it is. These fields are a part of a section that we'll hide so that it doesn't show up to the end user.
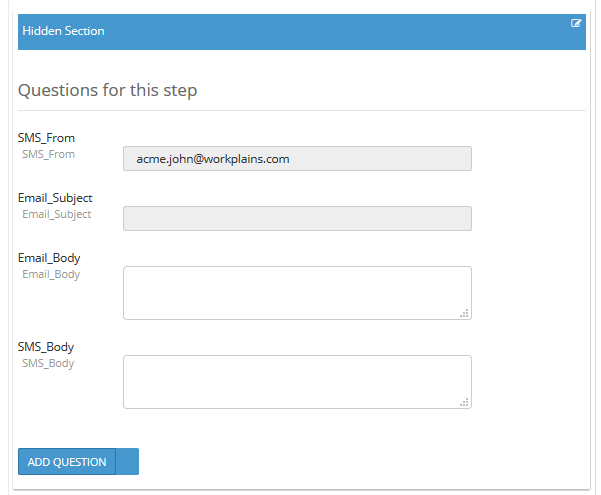
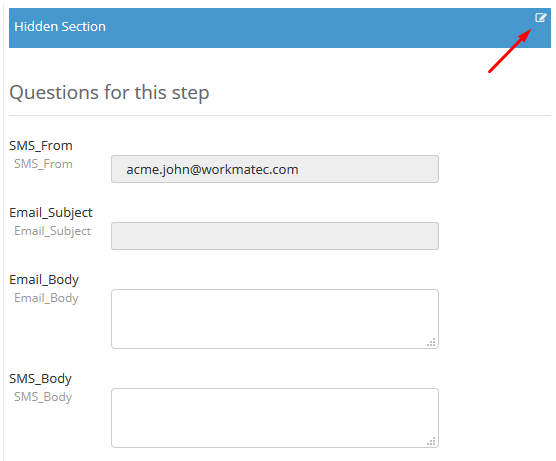
Below is the expanded view of the hidden fields in this section.
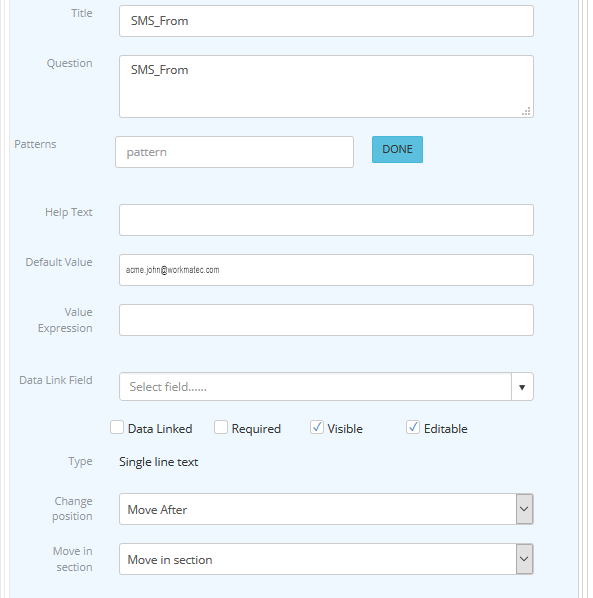
Once you're done creating these fields, you would then want to make the entire section as hidden so that it does'nt show up to the user. We just need these fields for the internal working of the Skill.
'Uncheck' the checkbox that says 'Visible' as shown in the two screenshots below.

Once done, head over to the next section to learn about the Skill control types.